


Installing a sink faucet in Duncanville, TX, can seem challenging, but with the right approach, it doesn’t have to be. You’ll want to gather essential tools and materials before getting started. Turning off the water supply is vital to avoid any mishaps. Once you’ve removed the old faucet, you’ll be ready to prepare the sink surface for the new installation. But there are a few more steps to guarantee everything goes smoothly.
Gather the Necessary Tools and Materials
Before you plunge into installing your new sink faucet, it’s essential to gather all the necessary tools and materials. Start by collecting a basin wrench, an adjustable wrench, and a screwdriver—these will help with the installation process.
You’ll also need Teflon tape and plumber’s putty to guarantee a watertight seal. Don’t forget to grab a bucket or towel to catch any drips during the installation.
Next, check if your new faucet comes with mounting hardware; if not, you may need to purchase it separately.
Finally, having a pair of pliers and a utility knife on hand can save you time and hassle. Additionally, ensure you have access to reliable faucet repair services in case you encounter any issues during the installation process. Once you’ve got everything laid out, you’ll be ready to tackle the installation confidently.
Turn Off the Water Supply
To start your sink faucet installation, make certain to turn off the water supply. You can usually find the shut-off valves under the sink. Turn these valves clockwise until they’re fully closed.
If you don’t see any under-sink valves, locate the main water supply valve for your home and turn it off. It’s essential to guarantee the water is shut off completely to avoid any unexpected spills during the installation.
Once the water supply is off, you might want to open the faucet to release any remaining pressure and drain the lines. This step helps you work more safely and efficiently. Additionally, having a reliable toilet repair service on hand can be beneficial in case any plumbing issues arise during your faucet installation.
Keep a bucket or towels handy to catch any residual water that may still be in the pipes. By taking these precautions, you’ll set the stage for a smoother installation process and minimize potential mess.
Now you’re ready to move on to removing the old faucet.
Remove the Old Faucet
Start by gathering your tools, as removing the old faucet is the next step in your installation process. You’ll need an adjustable wrench, basin wrench, and a bucket to catch any water.
Begin by disconnecting the water supply lines. Use your adjustable wrench to loosen the nuts securing the lines to the faucet. Once you’ve removed those, place the bucket underneath to catch any residual water.
Next, locate the mounting nuts holding the faucet in place. Use your basin wrench to reach tight spots and unscrew these nuts. Carefully lift the faucet out of the sink. If it’s stuck, gently wiggle it to free it. Be cautious not to damage the sink surface during removal.
After you’ve successfully taken out the old faucet, clean the area to prepare for the new installation. It’s essential to ensure that your new installation is backed by a two-year repair guarantee to provide you with peace of mind. You’re one step closer to enjoying your updated sink faucet!
Prepare the Sink Surface
Preparing the sink surface is vital for a successful faucet installation. Start by thoroughly cleaning the area where the new faucet will sit. Remove any debris, soap scum, or old sealant that might interfere with a proper seal. You can use a mixture of warm water and mild detergent, scrubbing gently with a non-abrasive sponge.
Once the surface is clean, inspect it for any damage. If you notice cracks or chips, it’s important to address these issues before installing the new faucet. Consider using a suitable filler to repair any imperfections.
Next, dry the surface completely with a clean cloth. This step prevents moisture from affecting the installation and helps guarantee a tight seal. Regular inspections can help identify any potential issues that may affect your plumbing before they escalate.
Finally, gather any necessary tools and materials, so you’re ready to move on to the installation phase without interruptions. With a prepared sink surface, you’ll set the stage for a smooth and effective faucet installation.
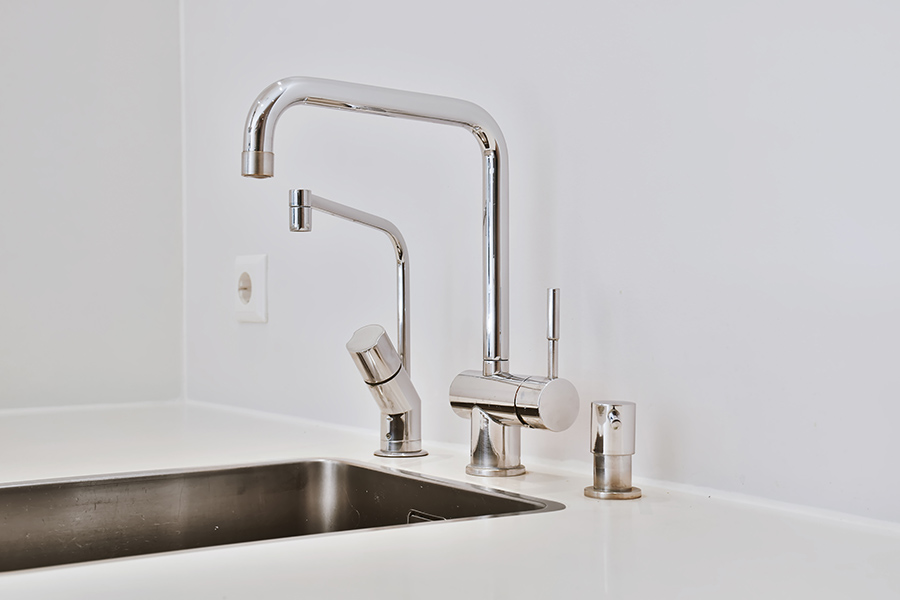
Install the New Faucet
Now that you’ve prepared the sink surface, it’s time to install the new faucet.
Gather the necessary tools, like a wrench and plumber’s tape, to guarantee you’re ready for the job.
Follow the installation steps carefully to get everything set up correctly and efficiently.
Gather Necessary Tools
Before diving into the installation of your new sink faucet, you’ll need to gather a few essential tools to guarantee a smooth process.
Start with a basin wrench, which makes it easier to tighten and loosen nuts in tight spaces. You’ll also need a screwdriver, an adjustable wrench, and pliers for various fittings.
A bucket or towel will help catch any water that might spill during the process. Don’t forget plumber’s tape to ensure leak-proof connections.
Finally, having a utility knife on hand can be useful for any unexpected adjustments.
Follow Installation Steps
Begin by positioning the new faucet in the sink’s mounting hole. Make sure it’s centered and secure before moving on.
Next, follow these steps to complete the installation:
- Attach the mounting bracket: Use the screws provided to secure the faucet in place.
- Connect the water supply lines: Hand-tighten the hot and cold lines to the corresponding valves under the sink.
- Check for leaks: Turn on the water supply and let it run for a minute, ensuring no leaks occur at the connections.
- Install the handle: Depending on your faucet model, attach the handle and secure it according to the manufacturer’s instructions.
With these steps, you’ll have your new faucet ready to go in no time!
Connect the Water Supply Lines
Now that your new faucet is in place, it’s time to connect the water supply lines.
You’ll need to prepare the supply lines carefully and make sure all connections are secure.
This step is essential for preventing leaks and making certain your faucet works properly.
Prepare the Supply Lines
To connect the water supply lines, first, gather your tools and materials, confirming you have the right fittings for your faucet.
Next, prepare the supply lines for a smooth installation. Here’s what you’ll need:
- Adjustable Wrench – To tighten fittings securely without damaging them.
- Teflon Tape – For wrapping threads on fittings, creating a watertight seal.
- Pail or Bucket – To catch any water that might spill during the connection process.
- Rags or Towels – For cleaning up any excess water or mess.
Once you have everything ready, check for any debris in the supply lines and confirm the shut-off valves are turned off.
This preparation will make connecting the lines easier and more efficient.
Secure Connections Properly
Securely connecting the water supply lines is essential for preventing leaks and guaranteeing proper faucet functionality.
Start by positioning the supply lines so they’re easily accessible. Hand-tighten the connections at the faucet first, making sure they sit flush against the fittings.
Next, use a wrench to tighten them just enough—avoid over-tightening, as this can damage the fittings.
Once connected, turn on the water supply and check for leaks. If you see any, tighten the connections slightly until the leaks stop.
It’s a good idea to have a towel handy to wipe up any minor spills.
Check for Leaks
Before you finish installing your sink faucet, it’s crucial to check for leaks to confirm everything is functioning properly. A few simple steps can help guarantee your installation is watertight.
- Turn on the faucet: Run both hot and cold water for a few moments. Keep an eye on all connections and the base of the faucet for any signs of dripping.
- Inspect connections: Look closely at the supply lines and fittings. If you see moisture, you may need to tighten them or add more plumber’s tape.
- Check under the sink: Crawl under the sink and examine the area for any leaks, especially around the shut-off valves.
- Wipe surfaces: Use a cloth to dry the area, then wait a few minutes. If you spot water again, you’ve likely got a leak that needs addressing.
Taking these steps will help guarantee your faucet is leak-free and ready for use!
Turn On the Water Supply
Now that you’ve checked for leaks, it’s time to turn on the water supply and guarantee everything is functioning smoothly.
Start by locating the shut-off valves under your sink. Make sure they’re securely closed before you proceed.
Once you’re ready, slowly turn on each valve by rotating it counterclockwise. This gradual approach helps avoid sudden pressure surges that could cause leaks or damage.
Keep an eye on the connections you just tightened; watch for any signs of leakage as the water flows. If you notice any drips, don’t panic—simply turn off the water supply and tighten the fittings as necessary.
Once you’re confident everything’s secure and leak-free, you can move on to the next steps. Remember, taking your time here can save you from potential headaches later on.
Good luck!
Test the Faucet Functionality
Now that you’ve turned on the water supply, it’s time to test the faucet functionality.
Start by checking the water flow to guarantee it’s strong and steady.
Then, inspect for any leaks around the connections to confirm everything’s secure.
Check Water Flow
How can you guarantee your new sink faucet is functioning properly? After installation, it’s important to check the water flow to confirm everything’s working as it should. Here’s how to do it:
- Turn on the faucet: Switch on both hot and cold settings to observe the flow.
- Check for even flow: Confirm the water streams evenly without sputtering or interruptions.
- Assess pressure: Notice if the pressure feels strong and consistent; weak pressure might indicate an issue.
- Listen for sounds: Pay attention to any unusual noises, like hissing or banging, which could signal problems.
Inspect Leaks Thoroughly
Once you’ve checked the water flow, it’s important to inspect for leaks thoroughly to guarantee your faucet functions as it should.
Start by turning on the faucet and observing the base and connections for any signs of dripping or moisture.
Don’t forget to check under the sink, as leaks can often hide there.
If you spot any leaks, tighten the connections carefully, but don’t overtighten, as this can cause damage.
You might also want to apply plumber’s tape to threaded connections for a better seal.
Finally, let the water run for a few minutes while you monitor for leaks.
A functional faucet not only saves water but also helps you avoid costly repairs down the line.
Clean Up and Finalize Installation
As you wrap up the faucet installation, it’s essential to make sure everything is clean and functioning properly. A tidy workspace and a well-functioning faucet guarantee a successful project.
Here’s what to do next:
- Remove Tools and Debris: Gather all your tools and dispose of any leftover packaging or debris. This keeps your space organized and safe.
- Wipe Down Surfaces: Use a damp cloth to clean the sink area and faucet, removing any fingerprints or dust.
- Test the Faucet: Turn on the water to check for leaks and verify that hot and cold water flows correctly. Adjust as needed.
- Final Inspection: Double-check all connections and fittings, making sure everything is tight and secure.
Conclusion
In summary, installing a sink faucet can be a breeze if you follow these expert tips. Each step is essential for a successful installation, from gathering your tools to testing the faucet. So, roll up your sleeves and jump in—you’ll be amazed at how rewarding it feels to tackle this project on your own. Remember, taking your time now can save you from headaches down the road, so don’t rush the process!