

Installing a sink faucet can feel like a simple task, yet it often leads to unexpected headaches. If you want a flawless setup in Grand Prairie, TX, you’ve got to know a few expert secrets. From choosing the right faucet to ensuring a leak-free connection, every step matters. Let’s investigate how to transform this common project into a seamless experience that meets your kitchen’s needs and improves its style—with help available from local plumbing services in Grand Prairie, TX when you need professional support.
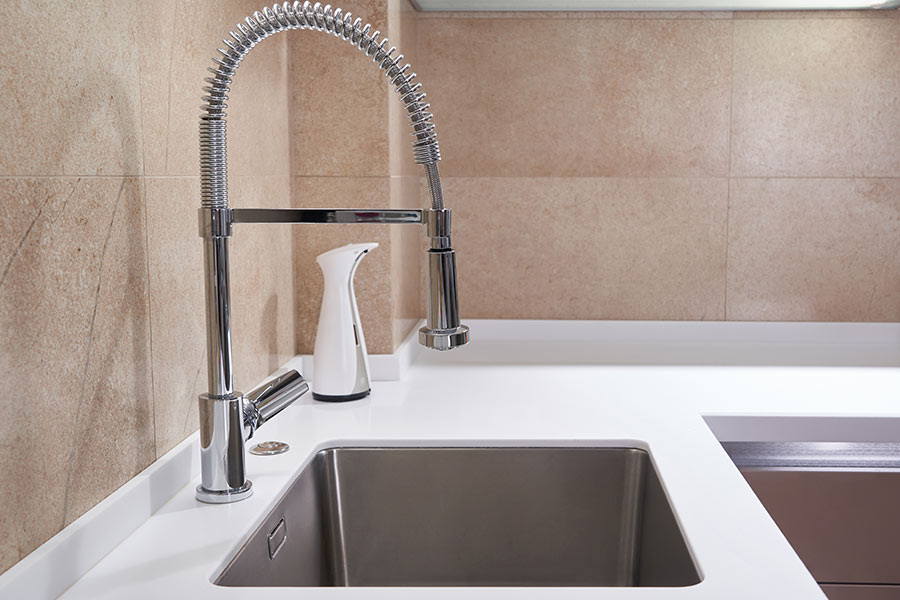
Choose the Right Faucet for Your Sink
When you’re choosing the right faucet for your sink, consider both functionality and style to make certain it fits your needs.
First, think about how you’ll use the faucet daily. Do you need a high-arch spout for filling large pots, or is a pull-down sprayer more your style for rinsing?
Next, pay attention to the material. Stainless steel offers durability, while chrome delivers a sleek look.
Don’t forget to match the faucet’s finish with your sink and surrounding décor. A unified design can enhance your kitchen or bathroom.
Additionally, check the faucet’s water flow rate; a good balance between pressure and efficiency will save you money on your water bill.
Finally, verify compatibility with your sink’s configuration—single or three-hole installation will affect your options. By choosing a faucet with a reliable water flow rate, you can ensure efficient functioning of essential daily life fixtures, which will contribute to a more sustainable plumbing system and can be supported by professional faucet repair and replacement services when needed.
With these considerations in mind, you’ll find a faucet that’s not just functional but also a stunning addition to your space.
Gather Necessary Tools and Materials
To guarantee a smooth faucet installation, gathering the right tools and materials is essential.
Start by collecting a basin wrench, adjustable wrench, and a screwdriver. You’ll also require plumber’s tape, a bucket, and a sponge to catch any drips. In addition, have a pair of pliers handy for any stubborn fittings.
Next, gather your faucet, mounting hardware, and any necessary fittings that came with it. Double-check that you have the correct size and type for your sink.
If your new faucet requires a specific type of supply line, make sure to have those on hand as well.
Finally, grab a towel or rag for easy cleanup during the installation. Additionally, be aware that expert sink repair and replacement services can provide reliable solutions for any issues that may arise during your installation process, especially if you uncover existing sink or drain problems.
With these tools and materials ready, you’ll set yourself up for a successful faucet installation, minimizing frustration and ensuring everything goes smoothly.
Happy installing!
Turn Off the Water Supply
Before you plunge into the installation, make sure to turn off the water supply to avoid any unexpected sprays or leaks.
Locate the shutoff valves under your sink; they’re usually connected to the hot and cold water lines. Turn each valve clockwise until they’re fully closed. If your sink doesn’t have shutoff valves, you’ll need to turn off the main water supply to your home.
Remember to open the faucet to relieve any pressure and drain residual water in the lines.
It’s a good idea to have a towel handy to catch any remaining drips. Double-check that the water isn’t flowing before you proceed with removing the old faucet.
Taking these steps will save you from messy surprises and make your faucet installation smoother. Plus, you’ll be grateful you took this precaution when you’re knee-deep in your project! Additionally, addressing leaky toilets promptly can prevent significant plumbing issues and save you money on water bills, helping your whole bathroom run more efficiently.
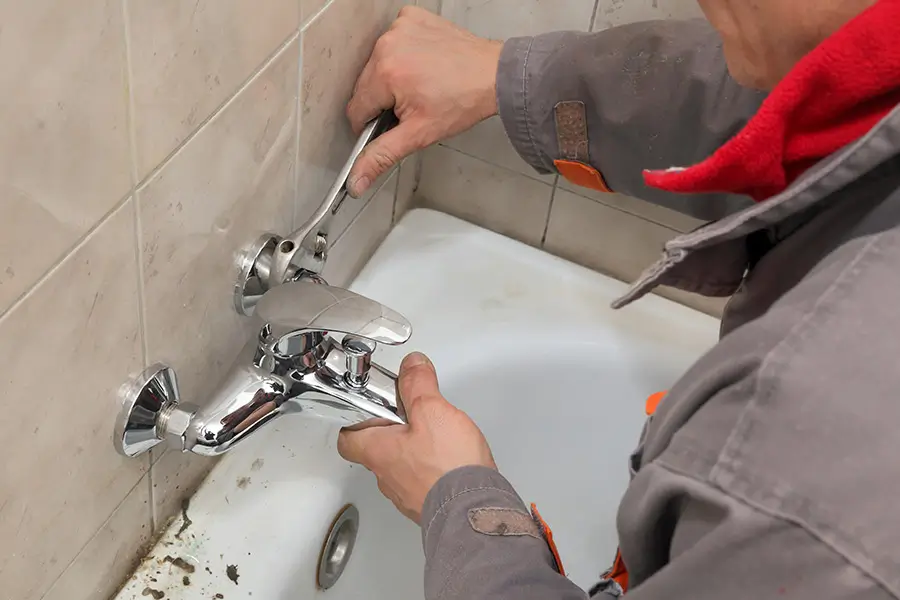
Remove the Old Faucet
Before you can install your new faucet, you need to remove the old one.
Gather the necessary tools like a basin wrench and pliers, and make sure you’ve already turned off the water supply.
This step’s essential for avoiding any messy surprises while you work. Additionally, ensure that you are aware of the importance of emergency plumbing help in case you encounter any unexpected issues during the removal process—emergency plumbing services are available if something goes wrong.
Gather Necessary Tools
As you prepare to remove the old faucet, gathering the necessary tools will make the process smoother and more efficient.
Here’s what you’ll need to guarantee a successful removal:
- Adjustable Wrench: This will help you loosen and remove the nuts securing the faucet.
- Basin Wrench: A handy tool for reaching tight spots and gripping the faucet’s mounting nuts.
- Plumber’s Putty or Silicone Sealant: Use this to seal any gaps when you install the new faucet.
Having these tools on hand before you start will save you time and frustration.
Make certain everything’s within easy reach, so you can focus on the task at hand.
With the right tools, you’ll be well on your way to a successful faucet replacement!
Turn Off Water Supply
With your tools ready, it’s time to turn off the water supply to prevent any unwanted spills during the removal of your old faucet.
Locate the shut-off valves under your sink. Turn them clockwise until they’re fully closed. If you don’t see valves, you might need to shut off the main water supply to your home.
Once that’s done, open the faucet to relieve any remaining pressure and drain excess water. Keep a bucket or towel handy to catch any residual drips.
After ensuring the water is off, you can move on to disconnecting the supply lines. Remember, safety first—double-check that the water is completely turned off before proceeding with the removal of your old faucet.
Prepare the Sink Surface
To guarantee a successful faucet installation, you need to start by preparing the sink surface properly. A clean and well-prepped workspace makes the process smoother and helps prevent issues later on.
Here’s how to get it ready:
- Clear the Area: Remove any items from around the sink. This includes soap dispensers, sponges, and decorative items that might get in the way.
- Clean the Surface: Wipe down the sink thoroughly with a suitable cleaner. This helps remove any grime or residue, ensuring a tight seal for your new faucet.
- Check for Damage: Inspect the sink for any cracks or chips. Addressing these issues now can save you headaches in the future.
Taking these steps will set you up for success as you move on to installing your new faucet. A little preparation goes a long way in achieving that perfect installation!
Install the New Faucet
Now that the sink surface is prepped and ready, you can start installing your new faucet.
Begin by placing the gasket on the base of the faucet, ensuring it’s centered properly. Next, insert the faucet through the mounting hole in the sink. From underneath, secure it with the provided mounting nuts.
Tighten them gently but firmly, being careful not to overtighten, which could damage the sink or faucet.
If your faucet has a pull-down sprayer, connect it to the hose according to the manufacturer’s instructions. Make sure everything is aligned correctly for smooth operation.
Once the faucet is in place, double-check that it’s level and stable.
Finally, wipe away any excess sealant or debris around the base for a clean finish.
You’re now ready to move on to connecting the water supply lines, bringing you one step closer to enjoying your new faucet!
Connect Water Supply Lines
Connecting the water supply lines is a crucial step in completing your faucet installation. This process guarantees that your new faucet gets the water it needs to function properly.
First, gather your materials and tools, including the water supply lines, adjustable wrench, and plumber’s tape.
Next, follow these steps:
- Attach supply lines: Connect the hot and cold supply lines to the corresponding valves under your sink. Ensure a snug fit to prevent leaks.
- Use plumber’s tape: Wrap plumber’s tape around the threads of the fittings to guarantee a watertight seal.
- Tighten connections: Use your adjustable wrench to tighten the connections, but be careful not to over-tighten, which can damage the fittings.
Once you’ve secured everything, step back and admire your work. You’re one step closer to enjoying your new faucet!
Check for Leaks
Once you’ve connected the water supply lines, it’s essential to check for leaks.
Inspect all connections thoroughly and keep an eye out for any drips. This step guarantees your installation is secure and prevents future water damage.
Inspect Connections Thoroughly
Before you finalize your sink faucet installation, thoroughly inspect all connections to confirm there are no leaks. Taking this step can save you from potential water damage and costly repairs down the line.
Here’s what to check:
- Supply Lines: Confirm the connections to the hot and cold water supply lines are tight and secure.
- Faucet Base: Look for any gaps between the faucet and the sink; confirm the mounting hardware is properly tightened.
- Drain Assembly: Check the drain connection for any signs of moisture or loose fittings.
Test for Drips
Regularly testing for drips is essential to guarantee your new sink faucet is leak-free. After installation, turn on the faucet and let it run for a minute.
Then, check the area around the base and connections for any signs of moisture. If you spot water pooling, it indicates a potential leak.
Don’t forget to inspect the faucet handle and spout—these areas can likewise develop drips. If you notice any leaks, tighten connections or replace washers as needed.
It’s wise to repeat this test periodically, especially after heavy use. By staying vigilant and addressing issues quickly, you’ll maintain your faucet’s efficiency and prevent costly water damage down the line.
Test the Faucet Functionality
Testing the faucet functionality is crucial to guarantee everything’s working as it should. After your installation, take a moment to verify your faucet operates smoothly and effectively.
Here’s how to check:
- Turn the Handles: Rotate both hot and cold handles to verify smooth movement and proper temperature regulation.
- Check Water Flow: Observe the water flow from the faucet to confirm it’s consistent and doesn’t sputter or pause.
- Inspect Sprayer Features: If you have a sprayer attachment, test its functionality to validate it disperses water effectively without leaks.
These steps help you identify any potential issues early on, making sure you’re set for a hassle-free experience.
If you notice any problems during your testing, don’t hesitate to reach out to a professional for assistance. A little diligence now can save you from future headaches!
Maintain Your Faucet for Longevity
To keep your faucet in top shape, establish a regular cleaning schedule and stay on the lookout for leaks.
Don’t forget to replace any worn parts as needed to maintain its functionality.
Regular Cleaning Schedule
While a beautiful sink faucet can improve your kitchen or bathroom, maintaining its appearance and functionality requires a consistent cleaning schedule.
By regularly cleaning your faucet, you’ll prevent mineral buildup and keep it looking new. Here’s how to create an effective routine:
- Wipe down the faucet daily: Use a soft cloth to remove water spots and prevent grime.
- Deep clean weekly: Apply a gentle cleaner to tackle more stubborn stains and buildup.
- Check for water spots monthly: Use vinegar to dissolve any mineral deposits and restore shine.
Inspect for Leaks
A well-maintained faucet is vital for both functionality and aesthetics in your home. Inspecting for leaks regularly is key to ensuring your faucet operates efficiently.
Start by checking under the sink and around the faucet base for any signs of water accumulation. Don’t forget to look at the handles and spouts; even a small drip can indicate a bigger issue.
If you spot any leaks, it’s important to address them promptly. Not only do leaks waste water, but they can likewise lead to costly repairs down the line.
By incorporating leak inspections into your routine maintenance, you’ll extend the life of your faucet and maintain its performance.
Replace Worn Parts
Even after thoroughly inspecting for leaks, it’s important to keep your faucet in top shape by replacing any worn parts as needed.
This simple maintenance step can greatly extend the lifespan of your faucet and guarantee smooth operation.
Here are some key parts to reflect on replacing:
- Cartridge: A worn cartridge can cause drips and inconsistent water flow.
- O-rings: These small seals wear out over time, leading to leaks around the handle.
- Washers: Replacing these can eliminate annoying dripping sounds and improve performance.
Regularly checking and replacing these components won’t only prevent issues but furthermore boost your faucet’s efficiency.
If you’re unsure about any part, don’t hesitate to reach out to professionals like Benjamin Franklin Plumbing of Duncanville for assistance.
Get Professional Help for Your Grand Prairie Faucet Installation
By following these expert secrets, you’re not just installing a faucet; you’re crafting a reliable oasis in your kitchen. With the right faucet and a little elbow grease, you’ll transform your space and guarantee smooth functionality for years to come. So, roll up your sleeves, welcome the challenge, and enjoy the satisfaction of a job well done—while knowing help is nearby if you need it. When you’re ready for professional assistance or want extra peace of mind, you can schedule your faucet installation or repair with Benjamin Franklin Plumbing of Duncanville and get experienced support tailored to your Grand Prairie home. Your kitchen deserves this upgrade, and you’ll be glad you took the plunge!